Let's talk about behavior!

I've wanted to do a post on this topic for quite awhile. And of course, the week I finally sit down and type it, we just had a "super moon/harvest moon."
I never believed in the power of a full moon... until I became a teacher. Now, I'm a believer. Something about the full moon makes my kids go WILD!!

Perfect time to talk about behavior tracking, right?
Like most of the teaching world, I switched my behavior chart from cards to clips several years ago.

You can see my behavior card chart in the background of this picture from about 4 years ago.

I switched about 3 years ago to this clip chart. I remember I started seeing clip charts everywhere on Pinterest and hearing everyone talking about them. So of course I had to check it out.
One of the things I loved about the clip chart was that students could move up and down based on good or poor choices. If a student made a poor choice, they could have a chance to move the clip back up by making good choices.
I also loved that it rewarded the students who continually make good choices throughout the day. Whereas with the card chart, the goal was to stay on green, so as long as you weren't "bad" you stayed on green and you were fine.
The above clip chart was one that I made myself, and I was soo proud of it!
At the time, I was obsessed with Poppin Patterns by Creative Teaching Press. So I bought a bunch of Poppin Patterns borders and cut and glued them around card stock. Laminated them and strung the cards together with wrapping ribbon. This chart held up for 2 years and was retired this year.
This is the chart I use now.

I actually have 2 of these behavior charts, this one is on the boys bathroom door.

This one is on the girls bathroom door.
Yes, I am blessed to have 2 bathrooms in my room. Hallelujah!
I chose to use 2 different charts so that my students could easily find their clips and because I just liked the way it looked.
This behavior chart is available in my TpT store, here.
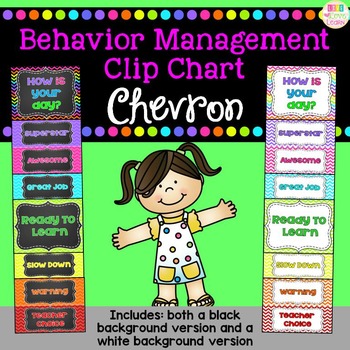
I love this chevron chart!
All students start on green, "Ready to Learn," each day. Their choices throughout the day decide if they should move their clips up or down.

Like everything else in my room, my behavior clips are bright and colorful.
I used sparkle cardstock from Hobby Lobby to decorate these clips. I just trimmed down cardstock to fit each clip and then used Mod-Podge to adhere the cardstock to the clip.
I actually did the Mod-Podging this summer while I was watching a movie. Multi-tasking people!
I do not put my students names on the outside of the clip. If your class is like mine, you have some nosy parents. I didn't like that anytime someone walked into my room, they could see exactly how everyone was behaving that day. Not their business! This was really bad at parties. When I used to use my card chart, I would turn all the cards back to green before the parents came in because I didn't want them to know about other children's behavior.
So I put each student's name on the back of the clip and use a sticker on the front to identify each student instead.

I print the names onto a printable file label, trim it down, stick it on the back of the clip, and then paint a thin coat of Mod-Podge on top so that I don't have to worry about the sticker coming off.
At the beginning of the year, I make a baggy of stickers for the boys and one for the girls. I make sure that there are only 2 of each sticker. A student chooses which sticker they want to go on the front of their clip, I put a thin coat of Mod-Podge on top of the sticker so that it doesn't come off. Then I put the coordinating sticker onto my sticker management chart.

I use this chart all the time. It helps me to quickly identify whose clip belongs to who, without having to look on the back of each one. I especially use this chart at the beginning of the year when they can't always seem to remember which sticker is theirs. I have had more than one case of a student moving the wrong clip up or down. So I usually do a quick check on my chart as clip moving is going on so that I can catch any mistakes.
And now, because I put the names are on the back of the clips, I don't have to worry about moving everything back to green when we have a parent volunteer or a party.
Throughout the day, I keep track of who moves their clip down and why.
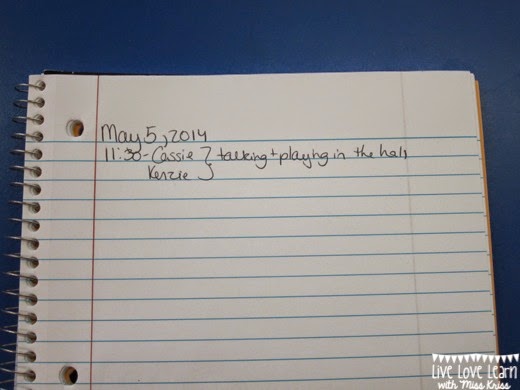
This is just a simple one-subject notebook from Walmart. I write down the date, time, child, and description. I started writing this down because if I don't, I will forget. Then at the end of the day when I would be filling out my behavior charts, I would forget why they moved their clip down. I would totally try to cover up the fact that I forgot by asking the child in question why they moved their clip down, in a stern voice, and they would usually tell me so that I could write it down.
Now I just keep this notebook on top of my filing cabinet throughout the day, and when I tell a student to move a clip down, I immediately go and write my notes. This is also super handy when I'm having a conference with a parent, because I can just whip it out.
At the end of the day, I fill out a behavior chart in my students' take-home folders.

The above chart is the one that I used for several years, my kindergarten team still use it. The rules are numbered 1-Be Respectful, 2-Be Responsible, 3-Be Safe. If a child stays on green or above, I would put a sticker on the box for that day. If a student moved their clip down, I would circle the number code for the rule they broke and then write a description in the box. If the students was on yellow, I circled 1 for 1 strike, and so on.
This behavior chart and the sticker management page are both included in my Behavior Clip Chart file.
It would have been much easier to continue using this behavior chart. But who wants things to be easy! No really, I got annoyed that I had to switch the chart out every 3 weeks and I wanted my students to be more involved in the behavior chart process, rather than just watching me while I filled it out for them.
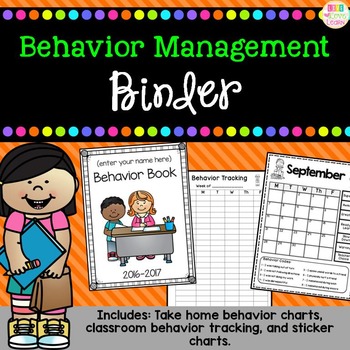
So out of necessity, the Behavior Management Binder and new behavior charts were created.

I made up a simple little binder with everything I needed to keep track of my kids' behavior.

I tucked a cheat sheet in the inside cover just in case an assistant or substitute has to manage my behavior charts. This page has the colors and phrases from behavior chart on the left side, and the behavior codes on the right side. Yes, I added a lot more behavior codes. This way I don't have to write a description of the behavior, the codes speak for me and let the parents know exactly what happened.
In the event of a major offense, I would contact the parent.

I also keep a sheet of stickers tucked in the pocket because I reward the students who end the day on blue, pink, or purple with a sticker on their sticker chart.
I keep a pencil pouch with all the colors of crayons I need (they match the behavior chart) and a sharpie.
At the end of the day, I set my binder open in front of me, I bring my students take-home folders back to my reading table, and start calling students to come fill out their behavior charts.
My small group/reading table is in the back of the room, right in front of the bathrooms (behavior charts are on the bathroom doors). I set out 2 folders at a time, call those students back to check which color their clip is on, and then color in their behavior chart using the correct color. (I usually double check to make sure they told me the right color by glancing at my sticker management page)

I made one of these charts for each month, so now I only have to switch them out each month as opposed to every 3 weeks. The first school day of each month, the students color in the behavior chart on the side of the page. Then each day they color in the correct square on the calendar with the color their clip is on at the end of the day.
This chart is editable so that you can type in the dates on the calendar. As you can tell, I forgot to do that before I had the August pages copied. So I just didn't worry about it for August. But when I started getting my September calendar ready, I made sure to type the dates in the boxes before I printed and copied.
If a student's clip ends the day on yellow, orange, or red, I use my sharpie to write a behavior code in the box and then have the student color over my code. If a student is absent, I write an A in the box when they come back.
The first few times I used my new behavior chart, I would have my students get their crayon basket from their desk and bring it back to me. I quickly realized that this was not efficient.
Half of the students would come sit down at my table, but would forget to bring their crayons. When they were finished, they would put their folder away, and I would have to remind them to come back and get their crayon basket so that they could put it away.
And have you ever noticed how many different shades of orange there are? My kids would grab a pink crayon and start coloring, then realize that it looked more red than pink. Or they would grab an orange crayon that looked more yellow than orange when they colored. This was driving me crazy because the colors on their charts weren't consistent. And when parents are specifically looking at the color on the behavior chart, the colors need to be consistent.
So I grabbed some extra crayons, 2 of each color, put them in a basket, and keep them beside my behavior management binder.

Now when I call my students back to the table to complete their behavior chart, they don't have to worry about bringing their crayons. They just use mine. And this way the colors are also consistent. Win-win situation.

While my students are coloring in their behavior charts, I am coloring in mine as well. I created a page to track weekly behavior. My chart reflects each student's chart. If I wrote a behavior code on a student's chart, I write the same behavior code on my chart. I then color the box the same color they colored their behavior chart. I also write A for absence on my chart. I have been using this binder for about a month and I love this weekly page so that I can quickly track my behavior and see patterns.
I also love this weekly chart because if a child's behavior chart goes missing, that so never happens right?, I didn't lose all the behavior data.

The first time we colored in the behavior chart, it took a little longer because I had to tell them which color to color each box. When we did our September page, they just looked at the behavior chart behind me and colored them all in on their own.

One of my favorite things about this new chart is that the kids take ownership for their behavior, good or bad, because they are coloring in their own chart. As opposed to me just writing on it for them. I love that they are responsible for filling it in.

The behavior charts stay tucked in the front pocket of my student's take-home folder (actually it's a binder) with this little reminder to the parents not to take it out.

I keep extra monthly behavior charts in a plastic sleeve behind the weekly tracking pages. Just in case a behavior chart does go missing.

I also keep my original of the weekly tracking page and extra stickers in the next plastic sleeve.
I hate having to get up and go find something when I'm in the middle of a task. I want everything within reach. So I keep everything I need, right inside my binder.

I wanted to reward my kids who earned the right to move their clip up to blue, pink, or purple. So I created these cute little behavior charts and let my students pick which color chart they wanted. While the students are coloring their behavior charts, I put stickers on their charts.
Blue = 1 sticker
Pink = 2 stickers
Purple = 3 stickers
When a student fills their chart, there are 30 boxes, I will them pick out a treat from the treasure box and they get a new sticker chart.

I love that no one, except me, can really tell which students are the best behaved. A parent coming in would never be able to tell whether a student has only a few stickers because they have trouble behaving or if they just started a new sticker chart.
As you can tell I've had some nosy parents in the past, so I work hard to try to ensure each student's privacy when it comes to their behavior at school. I tell my parents at the beginning of the year that their child's behavior is no ones business except mine, theirs, and the child's.

My sticker management chart and behavior binder fit nicely into this tub from Big Lots, and the crayons stay right in front. This little shelf is between my bathrooms and right behind my reading table. Like I said, I want everything within reach.
This behavior management binder is available on my TpT store in both editable and non-editable versions. The editable version can be modified to go with any clip chart system.
You can check it out here if you're interested.
How do you track behavior in your classroom?
I am always looking for new ideas!
No comments:
Post a Comment